Thursday, October 30, 2014
Wednesday, October 29, 2014
3 Ways to Improve Your Images With Composition
Along with lighting, subject, perspective, composition is one of the fundamental tools to creating better images. It's one of the easier ones to begin applying to your own photography as well. Here are a few tips on improving your composition, with examples from a recent fitness photo shoot.
1. Rule of Thirds
You've probably heard this one beat to death, but the rule of thirds is one of the fundamental keys in creating stronger compositions. It involves dividing an image into nine equal grids at the thirds. By placing your subject on the line of a third, or at the intersection of two thirds you're following your eyes' natural focus. We find photographs with the subject on one of these thirds simply more pleasing.
Take the below image for example, where this woman is placed on the left third line with the focus of her head near the top left third as well. It creates a more pleasing composition and gives the eye plenty of space to wander in the frame.
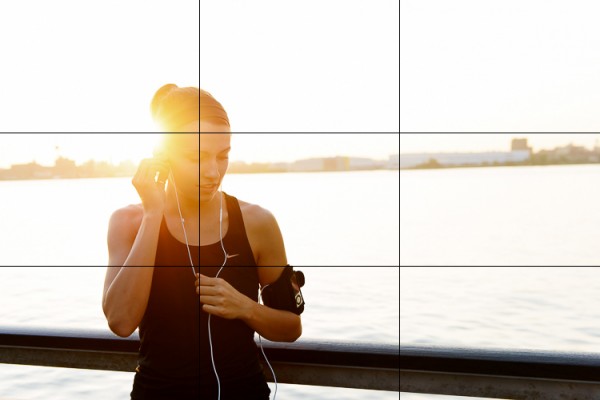
The rule of thirds isn't a hard and fast rule and it's often broken to great success, but that's a topic you can find in many other posts. It's a great starting point though to create stronger compositions.
2. Second Point of Interest
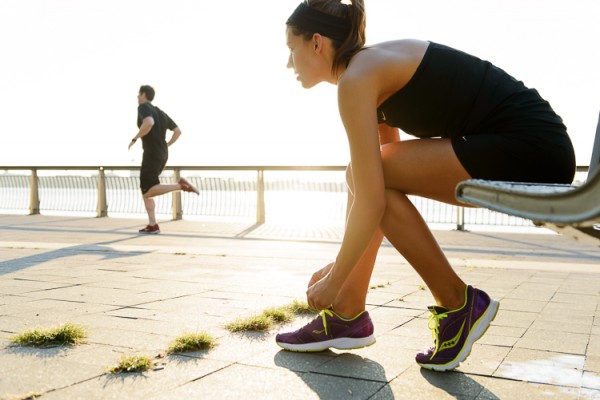
Applying the rule of thirds, you can now try adding a second point of interest into your images. Adding a secondary point, whether it's out of focus in the background or in focus with a deep aperture landscape, gives your image a natural viewing progression. Your eye starts at the first focal subject and then moves along to the second. Not only does this create more interest in your image, it can help reinforce a theme or perspective.
In this fitness image, the woman tying her shoe and preparing for a run is the clear focus of the image. Introducing a second runner in the background now creates another place for the eye to follow through the image. At the same time the "running" theme has been reinforced. Additional factors in leading the eye are; her gaze into the open space of the image, and the leading lines of the banister and concrete blocks.
3. Room for Copy Space
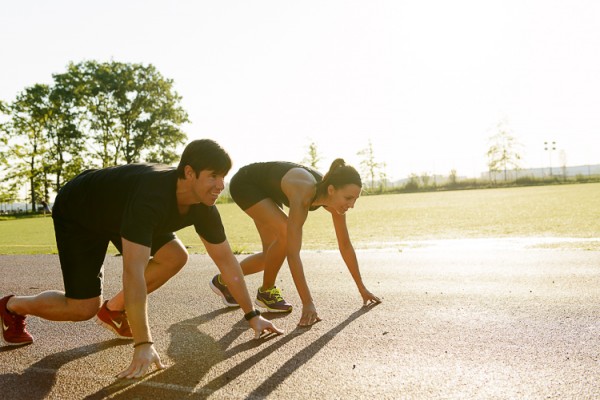
If you ever have aspirations to shoot for advertising agencies and many editorials, learning to leave room for copy space is a must. Copy space is the negative area in an image where a brand will place their tag line, logo or product/information. Generally you want this negative space to not be too busy, so that the copy pops out. The effect can be achieved often by using a shallow focus in your images, or by simple ensuring there is a space without too much "busy-ness" in it. A nice open sky often works great in this regard.
In this shot there's some clear head space in front of the two runners that works great for copy. An important thing to keep in mind though if you do end up applying these principles for a client, is how the images will be placed in publication. Will they be on a poster or against a store wall? Or across the pages of a magazine? This particular image might not work well across a double page spread, as it places the subjects' heads right where the crease would be. Against a store wall it would work just fine. These are important placement ideas to keep in mind with copy space.
Bringing It All Together
When you bring all three of these compositional elements into mind you can create a great image that not only holds interest, but appeals to the creative people who hire photographers (always a big plus). The image below is an example when all three work together. The subject is at one of the third grid lines, there's a secondary point of interest in the background and room has been left below for copy space. When you keep all three elements in mind you'll be on your way to creating stronger compositions.

Post originally from: Digital Photography Tips.
Check out our more Photography Tips at Photography Tips for Beginners, Portrait Photography Tips and Wedding Photography Tips.
3 Ways to Improve Your Images With Composition
Is that a Workshop, Tour or Seminar [Part III]
In part I and part II of this series we learned the photo workshop is typically one where the instructor concentrates on delivering an intense teaching/learning experience at a location conducive to enhancing that goal. In comparison is the photo tour where the delivery is all about exotic or exciting locations with a photo tour leader putting you in the right place at the right time, and might provide minimal formal instruction.
Located somewhere between the tour and workshop is the photo seminar. More often than not the seminar combines the best attributes of the workshop and tour by providing numerous lecturers and presentations, from internationally recognized keynote speakers who augment acclaimed local and national professionals in various photography disciplines.
In 1994, I attended a 60-minute presentation where a digital artist explained that a new software called Adobe Photoshop would revolutionize the photography industry. My notes from that lecture said "alpha mask - change sky." I later learned how to do alpha masks and discovered that I need not sit and look out a window while it was raining. Nineteen years later there is little argument that Photoshop has changed our industry, and "masks" are one of the foundation tools every digital photographer must eventually learn.
The seminar is also sometimes referred to as a conference, but the crux of the event remains very much constant: numerous presenters under one roof presenting a variety of topics by experts in their field over several days at one venue.
Seminars are offered by both private enterprise as well as professional and amateur photography associations who also may open their doors to non-members. In Canada the two most recognized national association conventions are hosted in different cities each year by the members of Professional Photographers of Canada (PPOC) and Canadian Association for Photographic Art (CAPA). You can do a web search in your country of residence for professional associations such as Professional Photographers of America (PPA) or your national amateur chapter of Fed ration Internationale de l'Art Photographique (FIAP).
Seminars are typically chock-a-block full of presenters offering a variety of topics and many also offer a slate of add-on field trips. It is not uncommon with the larger conventions to have 25, or more, presenters on a four day program which is augmented with a keynote presentation each evening. Intensity is the key word with seminars.
A close cousin to the seminar is the non-degree granting photo school. The concept is very similar, the delivery is quite different. Whereas in the seminar scenario participants are introduced to a variety of instructors, concepts and theories, the school typically places a classroom of students with one instructor for the entire time period. Additionally, the school tends to be more about a mixture of theory and practical application, whereas the seminar tends to deliver concepts and ideas for individual exploration at a later time.
Each approach has their advantages and disadvantages. If you are seeking exposure to a variety of concepts and motivation the seminar might be the best approach. By comparison, if you are seeking to spend a lot of one-on-one time learning a particular technique or skill set the school might be the better choice. Be aware, however, if you "hook-up" with a presenter in the seminar situation who has poor instructional technique you can find some solace that the next lecturer, an hour or so later, might be better. In the school environment, however, if you have a poor instructor you will be less than satisfied over the duration of several days, a week, or even longer. Be diligent and do your homework well; there are many great photographers who simply are not good at sharing their knowledge, skills or information for a variety of reasons. As suggested in the opening of this series, there are instructors and then there are teachers - not all are truly teachers.
In summation we can generally draw to following conclusions:
Workshop: Typically intense training with one instructor that includes field and formal classroom instruction with measureable outcomes. The location is secondary but supportive of the curriculum.
Photo Tour: Location(s) is the key ingredient and instruction is minimal if at all. The tour leader is typically a well known photographer who should also be familiar with the locations and scope of the tour, be it cultural, wildlife, etc.
Seminar: Typically a broad array of concepts, discussion and disciplines with a variety of presenters. It is about being introduced to new theories, approaches and motivation. They are typically shorter in duration with minimal practical application.
Post originally from: Digital Photography Tips.
Check out our more Photography Tips at Photography Tips for Beginners, Portrait Photography Tips and Wedding Photography Tips.
Is that a Workshop, Tour or Seminar [Part III]
Tuesday, October 28, 2014
How to Get a Job as a Second Shooter
Working as a second shooter has infinite upsides. Whether you’re looking to polish your photography skills, build a portfolio, work towards starting your own business, or simply keep shooting for a love of the craft, second shooting is a golden ticket. Additionally, assisting a main photographer lets you flex your creative muscles without the headache of running your own business.
While it's a great gig, getting started requires a good bit of networking, courage, skill, and a hearty dose of industry savvy. In order to assemble a foolproof guide to getting the job, we hacked the creative minds of world-renowned wedding photographers Jasmine Star and JD Delatorre. Jasmine has been voted one of the Top 10 Wedding Photographers in the World, and her work graces the pages of best-selling wedding and industry magazines. JD is Jasmine's other half, in both life and business. Together, they are a revered creative duo, and here’s what they had to say.
Know What Kind of Second Shooter You Are
JD believes there are three different kinds of shooters, and integral to succeeding is embracing your individual strengths and understanding what you bring to the role. Perhaps you are looking to establish yourself as a serious, full-time photographer, and second shooting is a stepping stone to that end. Maybe you are a casual hobbyist who enjoys the opportunity to engage with your love of shooting every once in awhile without needing to leave your day job. Or maybe you enjoy second shooting for exactly what it is-helping someone else while pursuing an artistic endeavor without the stress of running your own business. Knowing who you are and where you want to go will expedite your progress as a photographer, and help you land the jobs you want.
Polish Your Image
Before you step into the networking arena or hand out that first business card, make sure the links attached to your name are polished and appropriately branded. The photography industry is bought and sold upon aesthetics, and if your website looks like a failed coding project, it will hold you back. You want your identity and your style to shine through on your website. Make it clean, attractive, and unique. Equally important is the state of your portfolio. Second shooting provides a chance to build your portfolio, but you should have something solid in hand when you are reaching out to potential shooting partners. Before you get out there, make sure you have the materials to prove you’ve got the skills it takes.
Network Thoughtfully
While primary photographers network with clients, second shooters court other photographers. Make yourself known in the community of photographers in your area. Navigate the landscape. Find out who they are, where they roam, and gracefully integrate yourself into the herd. Do your research first. Making yourself marketable to other photographers necessitates a basic knowledge of their style and what they need. Once you’ve identified the need, provide evidence that you can fill it. Personal emails go a long way towards beginning a working relationship, as do follow-up phone calls. Once your portfolio is polished (and succinct-no one will sit through all 10,000 of your favorite photos), send it off with a personalized email to a photographer with whom you are interested in working. And remember, although getting hired is helpful to you, this job is about you helping them. Make sure that’s how it sounds.
Be Unique
When you contact a photographer, either in person or over email, they will want to know what makes you different from other second shooters. Naturally, you’ve got to know the answer to this question first. What makes you special? The purpose of a second shooter is to fill in the gaps, to pounce on different angles, to be where the main photographer is not, to round out the shoot with lovely photos. Maybe you have an uncanny sense for finding these angles, for capturing a bride and groom’s candid moments between poses, for getting glimpses of a mood the photographer doesn’t. Get in touch with your strengths, and practice the language that emphasizes them. Be bold about what you can offer, but don’t get ahead of yourself. An impressive skill set mixed with humility is an excellent and attractive recipe.
Get Out There
Most of the time, fruitful networking means leaving your house. Emails are a good start, and can turn up some worthwhile gigs, but when it comes down to it photographers want to work with someone they like being around. Your skills should be honed enough to produce the shots a photographer needs, but learning how to augment someone else’s style of working in the smoothest, most helpful, and least disruptive way is critical. Key to this is learning how to communicate on and off shoots. The more people you meet, the easier this gets. Wedding expos and sponsored industry events are a great start, and typically teeming with photographers. If you don’t know where else to go, ask around. Every photographer was at one point where you are now, and most will be keen to help you get started. Chances are, someone did it for them. Even if you’re shy, try to remember where you want to be, and develop the confidence that you have what it takes to get there. Even if that’s not quite true yet, there’s a good chance you will click with someone who will help illuminate the path.
Remember, the only way you’ll get where you’re going is to take the first step.
Jasmine Star and her husband JD are international wedding photographers, educators, and entrepreneurs based in Southern California. The husband and wife duo started their business in 2007 with little more than a bag of simple photo gear, but a lot of heart. Jasmine was voted Top 10 Wedding Photographer in the World, Top 5 Most Influential Photographers, and her work has graced the pages of the world's leading wedding publications (Town&County, Inside Weddings, The Knot, Ceremony, Cosmopolitan Bride, Wedding Magazine, Destination I Do, Bride&Bloom, Exquisite Weddings) and featured in industry publications (American Photo, Photo Professional, Rangefinder, Professional Photographer, Resource) alike. They are teaching a free course on The Art of Being a Second Shooter August 6-7 on creativeLIVE.
All images by Jasmine Star and JD Delatorre
30 Awesome Summer Themed Photoshop Tutorials from 2013
Photo effects never get old. They only may change in accordance with the latest trends. If you're looking for some Photoshop tutorials to spice up your images, this showcase was put together for you.
Here are 30 awesome summertime Photoshop tutorials released this year. In this list you'll find incredible watercolor effects, Polaroid, vintage and retro techniques, Instagram effects, tricks for working with layers, textures, colors and many more.
1. Create a Beautifully Designed 3D Starfish Icon
http://psd.tutsplus.com/tutorials/icon-design/starfish-icon/

2. Create a Summer Inspired Stroke Art Typography Piece using Sketch
http://vector.tutsplus.com/tutorials/create-a-summer-inspired-stroke-art-typography-piece-using-sketch/

3. Photoshop CS5 Tutorial: Instagram “1977″ effect (Vintage)
http://www.photoshoproadmap.com/Photoshop-blog/instagram-style-photo-effects-tutorials-in-photoshop/
4. Message in a Bottle-Working with Glass
http://fx.worth1000.com/tutorials/163646/message-in-a-bottle-working-with-glass

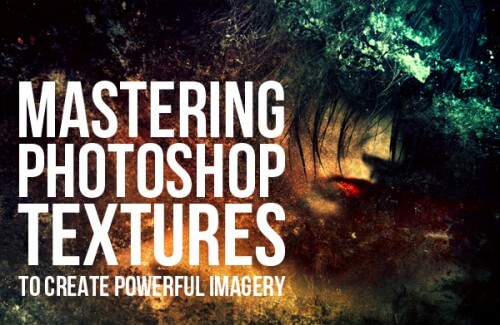
5. Mastering Photoshop Textures to Create Powerful Imagery
http://photodoto.com/mastering-photoshop-textures/
6. Photoshop tutorial: Photoshop’s layer effects explained
http://www.digitalartsonline.co.uk/tutorials/photoshop/photoshops-layer-effects-explained/

7. How To Give Your Photos a Cool Retro Analog Effect
http://blog.spoongraphics.co.uk/tutorials/how-to-give-your-photos-a-cool-retro-analog-effect

8. Create a Colorful Dune Buggy Illustration in Photoshop - Tuts+ Premium Tutorial
http://psd.tutsplus.com/tutorials/photo-effects-tutorials/colorful-dune-buggy

9. How to Unobtrusively Blend a Watermark Into Your Photos
http://photodoto.com/blend-a-watermark-unobtrusively-using-photoshop-cs-6/

10. Photoshop tutorial: Create an underwater artwork
http://www.digitalartsonline.co.uk/tutorials/photoshop/create-an-underwater-artwork/
11. Inspired by Oregon – Photoshop Tutorial
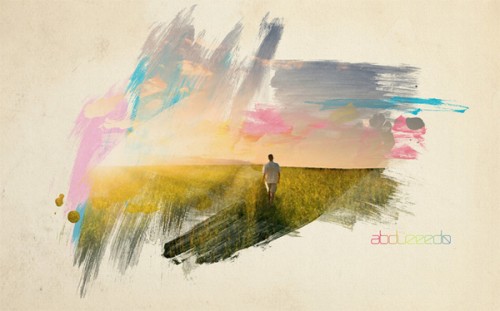
http://abduzeedo.com/inspired-oregon-photoshop-tutorial

12. Photoshop tutorial: Photo editing in Photoshop CC
http://www.digitalartsonline.co.uk/tutorials/photoshop/photo-editing-in-photoshop-cc/

13. Photoshop Tutorial: Create an Amazing Summer Flyer Design
http://crazypixels.net/photoshop-tutorial-create-an-amazing-summer-flyer-design/

14. Create a Soil Cake for Pie Charts and Infographics
http://psd.tutsplus.com/tutorials/photo-effects-tutorials/soil-cake-pie-charts-and-infographics/

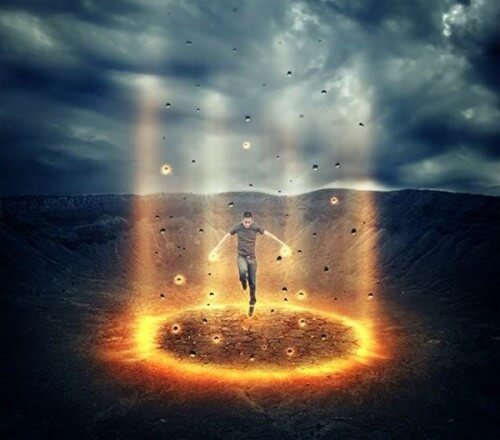
15. "The Controller" - Create this Floating Superhero Scene with Sci-Fi Lighting Effects in Photoshop
http://photoshoptutorials.ws/photoshop-tutorials/photo-manipulation/the-controller-create-floating-superhero-scene-sci-fi-lighting-effects-photoshop/
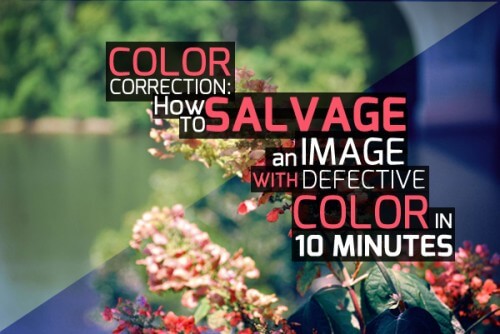
16. Color Correction: How to Salvage An Image With Defective Color in 10 Minutes
http://photodoto.com/color-correction-in-photoshop/
17. Create a Forest Dragon With Photoshop
https://tutsplus.com/tutorial/forest-dragon/

18. Secrets to Smoother Skin Textures Using Basic Photoshop Filters
http://basic3dtraining.com/secrets-to-smoother-skin-textures-using-basic-photoshop-filters/

19. Amazing Photo Manipulation "World on the Tissue" in Photoshop
http://crazypixels.net/amazing-photo-manipulation-world-on-the-tissue-in-photoshop/

20. Photoshop tutorial: Be bold with Photoshop effects
http://www.digitalartsonline.co.uk/tutorials/photoshop/be-bold-with-photoshop-effects/

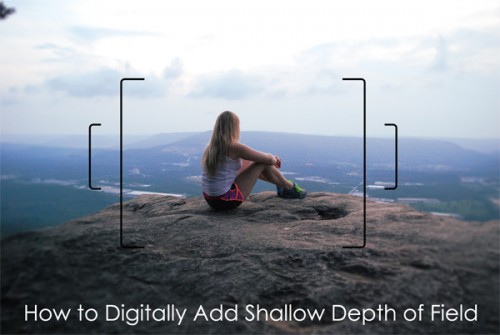
21. How to Digitally Add Shallow Depth of Field
http://photodoto.com/how-to-digitally-add-shallow-depth-of-field/
22. Create a Heart-Warming Wildlife Illustration in Photoshop
http://psd.tutsplus.com/tutorials/illustration/heart-warming-wildlife-illustration/

23. Create Unique 3D Grass and Stone Text Effect in Photoshop CS6 Extended
http://www.psdvault.com/text-effects/create-unique-3d-grass-and-stone-text-effect-in-photoshop-cs6-extended/

24. Create Facial Photo Manipulation Surrounded by Electrified Orbs in Photoshop
http://www.psdvault.com/photo-effect/create-facial-photo-manipulation-surrounded-by-electrified-orbs-in-photoshop

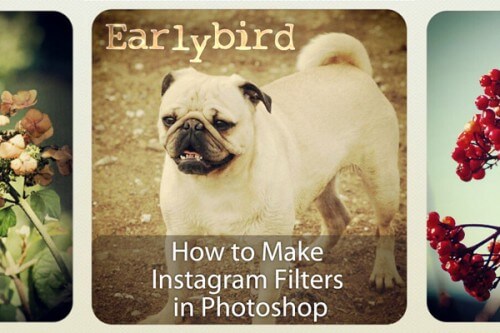
25. How to Make Instagram Filters in Photoshop: Earlybird
http://photodoto.com/how-to-make-instagram-filters-photoshop-earlybird/
26. Super Cool Watercolor Effect in 10 steps in Photoshop
http://abduzeedo.com/super-cool-watercolor-effect-10-steps-photoshop
27. Retroize Your Photos in Seconds
http://photoshoptutorials.ws/photoshop-tutorials/photo-effects/quick-tip-retroize-photos-seconds/

28. Photoshop Cs5 Tutorial: Instagram X-Pro II Effect (Cross Process)
http://www.photoshoproadmap.com/video/yt/X_DKcED2ZuI/

29. The Creation Process of "Urbanized" Photo Manipulation in Photoshop
http://www.psdvault.com/photo-effect/the-creation-process-of-urbanized-photo-manipulation-in-photoshop/
30. Create a 3D Text Effect With Photoshop and Maya - Tuts+ Premium Tutorial
http://psd.tutsplus.com/tutorials/text-effects-tutorials/3d-text-effect-photoshop-maya/

Conclusion
Which Photoshop tutorial you like best and why? Use comment section to leave your feedback or just say "hi". If this list turned up useful for you, don't hesitate to share it with your friends.

Nancy Young is a passionate writer and blogger. She writes tons of inspirational articles on photography, despite the fact that she is an economist by education. She is a part of the PhotoDoto Team. Get a new eBook about landscape photography for free – one useful gift just for visiting!
Monday, October 27, 2014
Sunday, October 26, 2014
Fashion Photography by Andrew Woffinden
Andrew Woffinden is a London-based photographer who has worked all over the world. After receiving an engineering degree in the UK, he moved to New York where he assisted the photographer Albert Watson. He has shot for brands such as Top Shop, Net-a-Porter, Mr. Porter, and Reiss, among others.


via fashion photography.
Need hosting? Design You Trust is proudly supported and hosted by WebHostingBuzz Premium Infrastructure & Network.