

The fish Training Kit - See it here
Like our Facebook for more awesome Gadgets, Gifts and Droolworthy Items.
The fish Training Kit - See it here
Like our Facebook for more awesome Gadgets, Gifts and Droolworthy Items.


We have actually listened to the quality this little speaker has - its pretty impressive for its size and price - See it here - Bluetune Solo Bluetooth Speaker
Like our Facebook for more bizarre gadgets, creative gift ideas and drool-worthy products.

Most of the time photographers use their camera by keeping its angle just at an eye level of the subject. It may be the landscape, documentary shots or portraits. The result is static lifeless routine images. By just changing your angle of view of your camera you can produce stunning results. Both a lower angle and a high angle work very topphotoshow.com


Looking for some fresh jQuery plugins? Your answer is our article today. Check out these useful jQuery plugins and see what can prove most useful for your upcoming projects.


View Source
A contribution from Lori Peterson
New photographers sometimes jump in and photograph everything they can. They will photograph a wedding one-day and commercial real estate on another. It isn't until later on that they realize the importance of finding their niche and concentrating on the things that fuel their art and their passion and still manage to pay their bills.
Life can bring you lessons you didn't even know you needed to be taught. I have been present as a photographer in hospital situations and you have to expect the unexpected. Whether it's shooting images at a birth or documenting a medical procedure for a family, you should always be prepared for things to change.
If you are planning on being a birth photographer, not only is it important for you to discuss expectations from your client, but you should also find out what the doctor and hospital will allow. Your client might want you to photograph parts of the delivery, but the hospital or doctor may have very strict rules about photography. Births aren't always smooth, quick, and without drama. You might plan on being at a birth for a few hours, but if labor stalls, you might be there longer. Expect the unexpected.
If you are allowed to photograph the birth you should be mindful of the doctor, the nurses, and all the other hospital staff that need to be in the room to take care of your client and the baby. Your job is to document, not to be in the way.
If complications arise and there is a need to go to the OR for a cesarean, make sure that your client has discussed this possibility with the doctor. The doctor and the anesthesiologist have the final say so as to whether or not you can go back with your client. Be polite and respectful. If you can't go back to the OR, make plans to photograph the baby as soon as possible so that your client can still have those early moments recorded.
If you are allowed back in the OR, ask the anesthesiologist about where you can shoot from. Don't badger them with questions and chitchat. Don't try shooting over the screen to get shots of the surgery itself.
Once the baby is born just remember to keep documenting those moments. Mom is missing out on some of those and Dad might need to be with her. Don't forget to capture the interactions of the new baby when they bring him or her over to Mom for the first time.

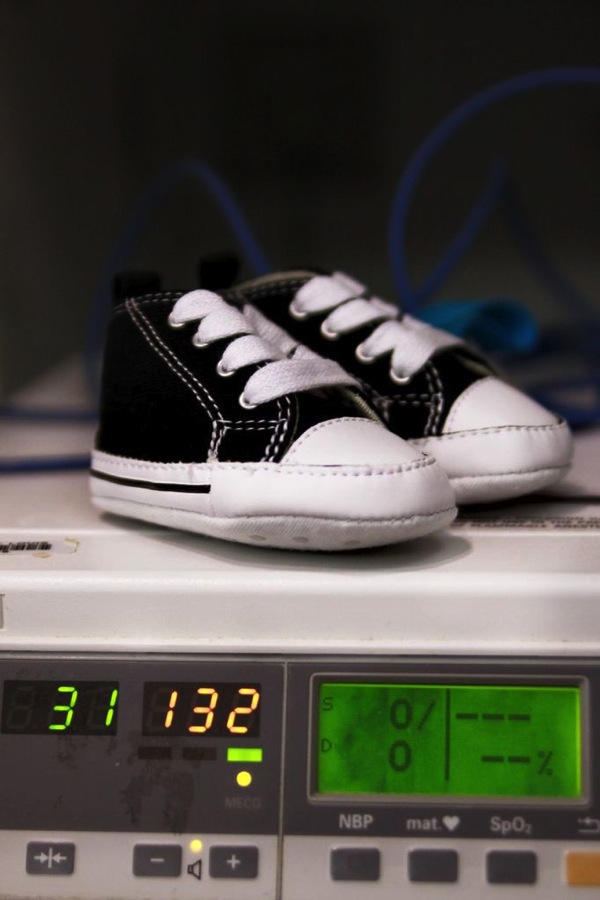
Learning to expect the unexpected has helped me when doing more photojournalism type shoots as well. Most recently I was hired to help a family document their six-year-old son's Selective Dorsal Rhizotomy surgery. Surgery time was pushed back a bit and then waiting time was also pushed back. There was a lot of waiting.
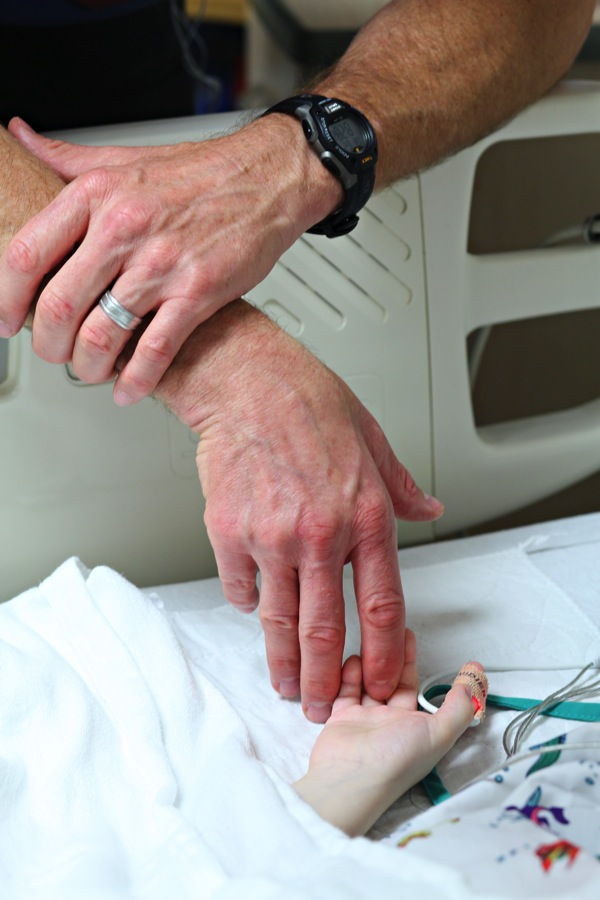
After his surgery he did a lot of sleeping. There was a lot of pacing and worrying from family members and from me as well. His parents just wanted to stick close by and be there in case he woke up. They talked to him, they held his hand and they waited.
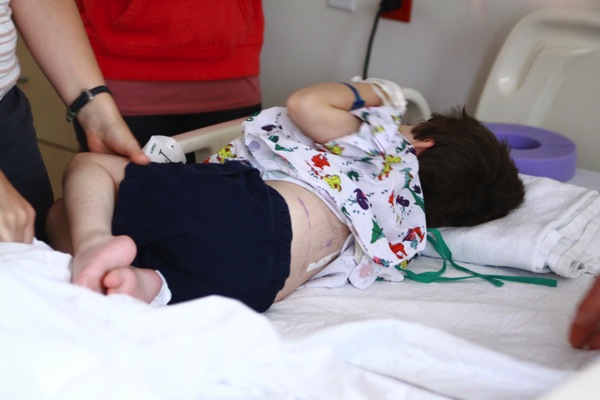
I shot images during his first time getting out of bed, his first time in physical therapy, and his first time crawling and standing after his surgery. Some of the moments when he was crying were so difficult for me, but I had to remind myself to keep documenting this for him and his parents to look back on. Lighting changed. People walked in. People walked out. He was awake. He slept. The situation changed routinely, but what was expected of me didn't.
For some photographers shooting in a hospital setting might not be ideal, but I can tell you from personal experience that helping families to document their lives is one of the most rewarding types of photography you can do.
Stepping outside of your comfort zone can bring you a new awareness of the world around you and remind you of how wonderful photography can be to document life events. It will physically and emotionally challenge you. You will have to learn to move fast. You will have to learn that sometimes the shot doesn't have to be technically perfect to tell the story. It's very different than portrait photography because you aren't in control of everything. You have to learn to give up some of that control and trust your instincts. Capturing those moments are such a precious gift you are giving to your clients, and you will reap the rewards by adding to your skill-set for future endeavors.
Lori Peterson is an award winning photographer based out of the St. Louis Metro Area. Her dynamic work ranges from creative portraits to very unique fine art photography. Lori's work can be seen at www.loripetersonphotography.com and also on her blog at www.loripetersonphotographyblog.com. You can follow her on Facebook at https://www.facebook.com/LoriPetersonPhotography.
Post originally from: Digital Photography Tips.
Check out our more Photography Tips at Photography Tips for Beginners, Portrait Photography Tips and Wedding Photography Tips.
Taking Your Photography Outside of Your Comfort Zone
A contribution from Lori Peterson
One of the most intimidating editing for some photographers is integrating textures. Textures can transform the mood and overall effect of an image. It can bring about a change that makes the image go from a nice photograph to a piece of fine art. There are an abundance of textures that can be found on the Internet and yet photographers are sometimes hesitant to use them because they feel overwhelmed or don't understand that using them can actually be very simple. Once you get used to using textures you can usually decide what tones you want to bring in and how you want to use them.
We are going to do two edits on the same image with the same texture but use two different techniques. Typically I will change the technique I use based on the amount of editing I think the image needs in order to really use the texture. You can use multiple textures and stack them in Photoshop and change their opacity. You can even vary which technique you use on each layer. The fun thing about Photoshop is that if you use layers you can play around with your image. If you don't like the effect, you simply delete the layer!
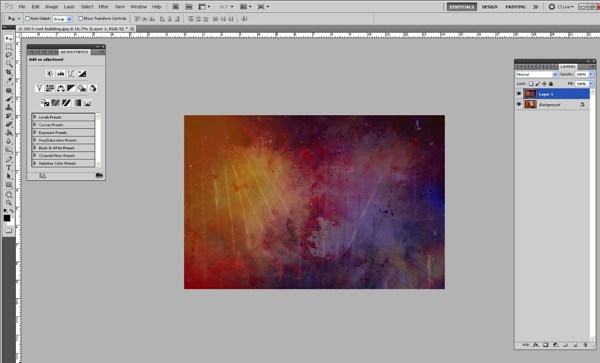
We are going to start by opening and image and a texture.
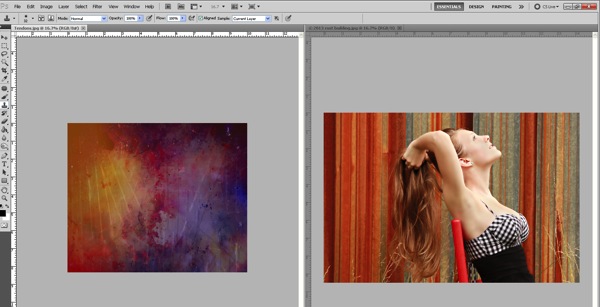
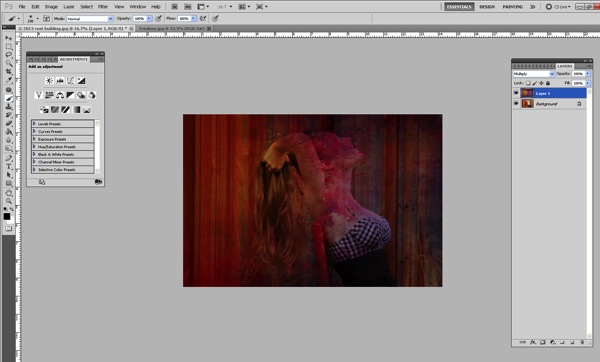
Now we will just drag the texture on top of our image. Size it over your image by using CTRL + T and dragging the corner to make it fit.
I typically will change my blending mode to screen or multiply (depending on the image) so that I can see the image underneath.
Now we need to remove the texture off her and her skin. We can do this one of two ways.
First of all we can just add a layer mask and then remove it off of her and her skin using a soft brush.
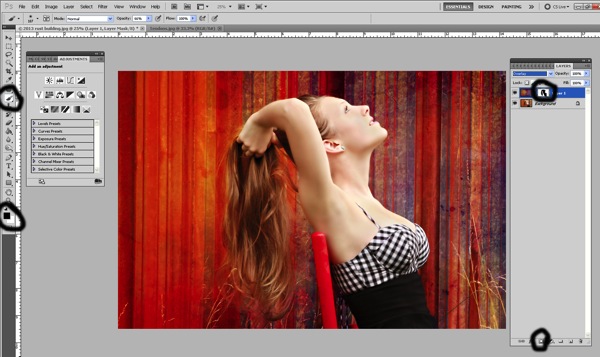
It can be tedious to do it that way because as you get into parts of hair and closer to where her skin meets the texture you will need to make your brush smaller.
If you prefer, you can remove the texture this way instead:
Once you overlay your texture, go ahead and change the opacity so that you can see underneath the texture. Add your layer mask, you will need that to correct any mistakes or to refine the technique we are about to do.
Make sure that the texture itself is what is highlighted. Select your lasso tool and then go around your subject. It doesn't have to be perfect, but it will take you a little practice to get the hang of it!
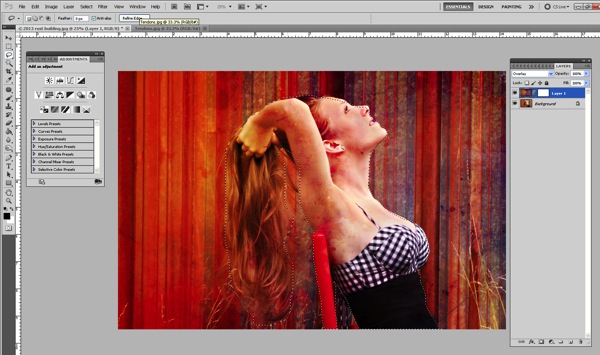
Once you have your subject highlighted using the lasso tool, then go up to Filter > Blur > Gaussian Blur.

Push the slider all the way over to the right.
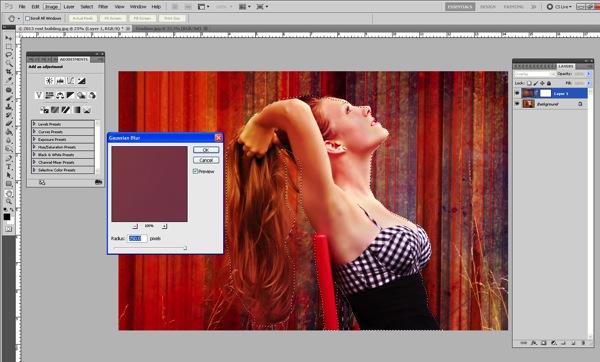
This will blur the texture on the subject. It doesn't blur the subject!
Now we need to refine the removal of the texture off our subject, which is much easier now that the texture is blurred.
Click on the layer mask and use your soft brush at a lower opacity to take off the parts of the texture you really want to remove. Since it has been blurred already, it's not as difficult and tedious to remove.
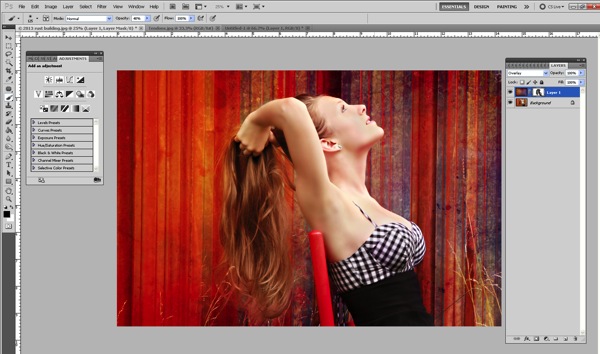
Then you can change your blending modes to fit the look you are trying to get for your image. You can also stack textures and leave the parts that you want or remove the parts you don't.
Textures can really enhance and change the look of your overall image. They can bring more depth and more color. They can change the mood. They are fun to experiment with and once you learn how to use them fluidly you can really do a lot in Photoshop to change your images.
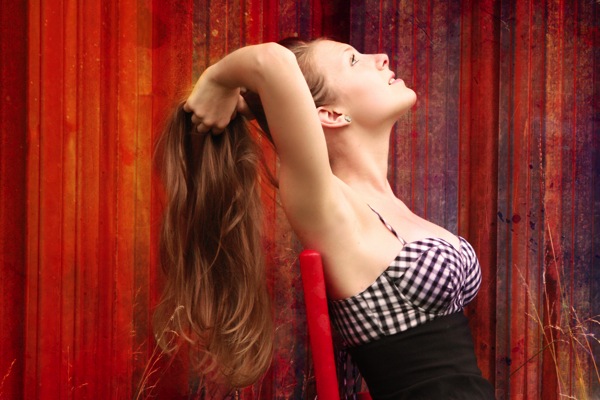
This was my final image using the Tendons texture overlay.
?
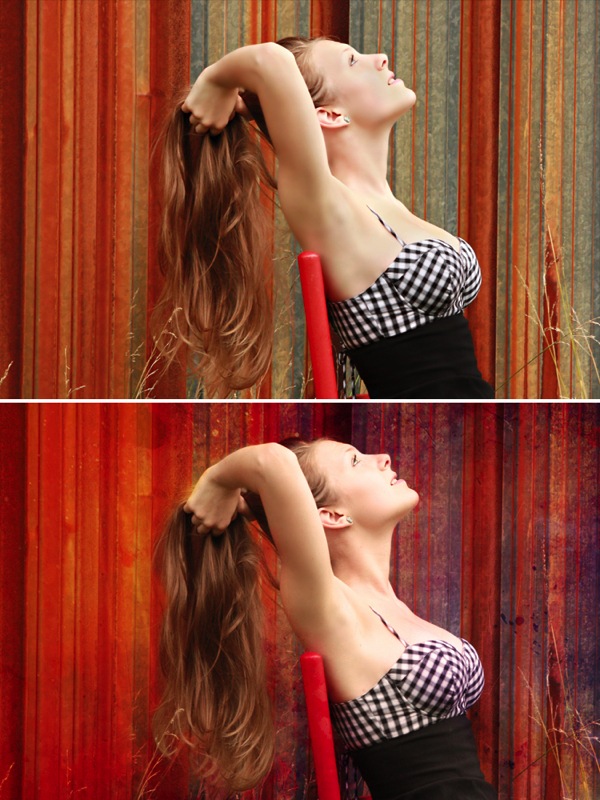
Here's the before and after so you can really see how the image changed.
Lori Peterson is an award winning photographer based out of the St. Louis Metro Area. Her dynamic work ranges from creative portraits to very unique fine art photography. Lori's work can be seen at www.loripetersonphotography.com and also on her blog at www.loripetersonphotographyblog.com. You can follow her on Facebook at https://www.facebook.com/LoriPetersonPhotography.
Post originally from: Digital Photography Tips.
Check out our more Photography Tips at Photography Tips for Beginners, Portrait Photography Tips and Wedding Photography Tips.
Textures Made Simple

This article is written by Andrew S. Gibson, the author of Square, on sale now at Snap N Deals for a limited time.
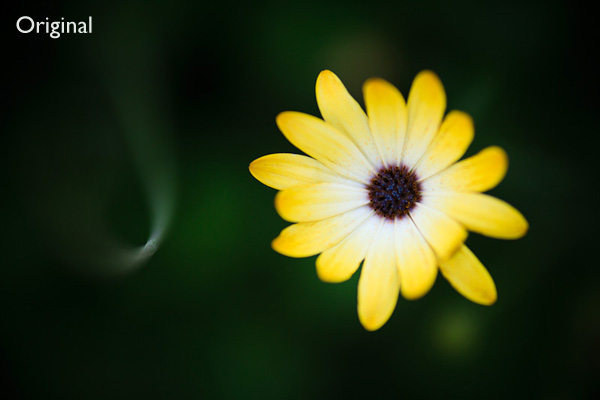
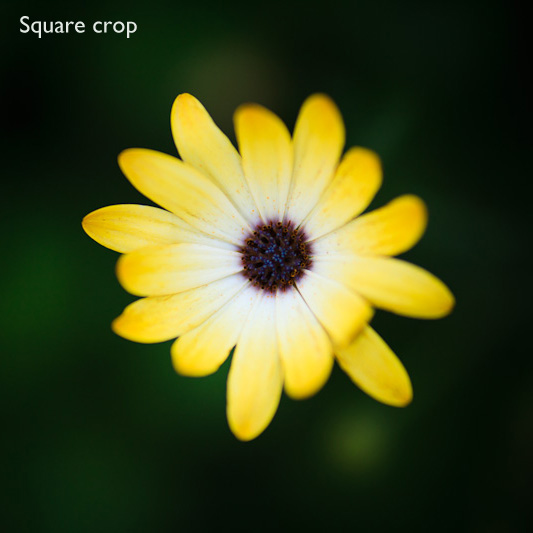
The square format seems to have gone in and out of fashion over the decades - and there's no doubt that it's currently experiencing a resurgence in popularity. This is at least partly due to the popularity of toy cameras like the Holga and smartphone apps like Instagram. But it's also got a lot to do ease of access. With film cameras, cropping aside, the camera you purchased determined the aspect ratio you worked in. With digital cameras you can take a photo and crop it to any aspect ratio you desire. That makes working in the square format a whole lot easier.
The first square format camera was made by Rollei in 1929. Square format cameras have been used by venerable names such as Richard Avedon, Irving Penn and Diane Arbus. Hasselblad, the mark of choice for many professional photographers in the film age, used the square format in its film cameras from 1948 to 2002. There are no current digital cameras (to my knowledge) that have a square sensor. But digital photography makes it easy to crop your images to any aspect ratio you want.
By the way, it's well worth taking some time to study the works of the masters mentioned above. It will teach you a lot about composition, and hopefully inspire you to try out the square format. Click on the links to learn more about each photographer:
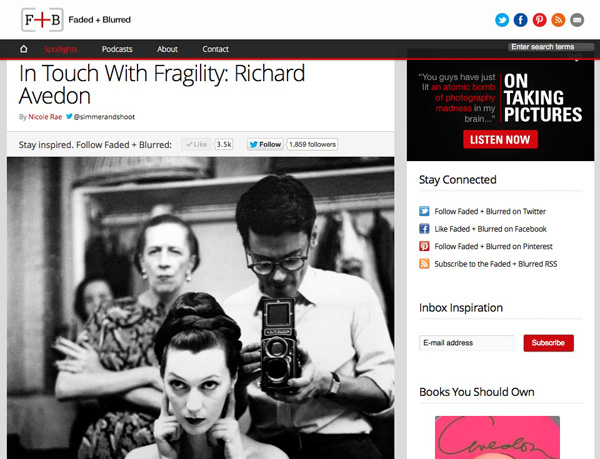
Richard Avedon was known for his stark, minimalist portraits. His approach changed the way fashion photos were taken forever. The first image in this article shows Avedon using a Rolleiflex camera.
Irving Penn is another famous fashion photographer who used minimalism and the square format to make his mark. His photos are known for their formal, graphic composition and stark use of white space.
Diane Arbus took the opposite approach to that of photographers like Irving Penn. She photographed outcasts and people on the margins of society, celebrating the ugly and unusual rather than the beautiful.
If you'd like to see the work of some of the modern exponents of square format photography, then take a look at my article 40 Beautiful Square Photos. I've collated a series of beautiful images from some of the best photographers around today.
Hopefully the above links have whetted your appetite for the square format. There are four main ways you can explore this aspect ratio:
1. Use a medium format film camera. These can be surprisingly inexpensive on the second-hand market. Look for brands such as Rolleiflex, Mamiya, Bronica or Hasselblad. Get the best quality scan you can of the negatives so you can work on them in Photoshop.
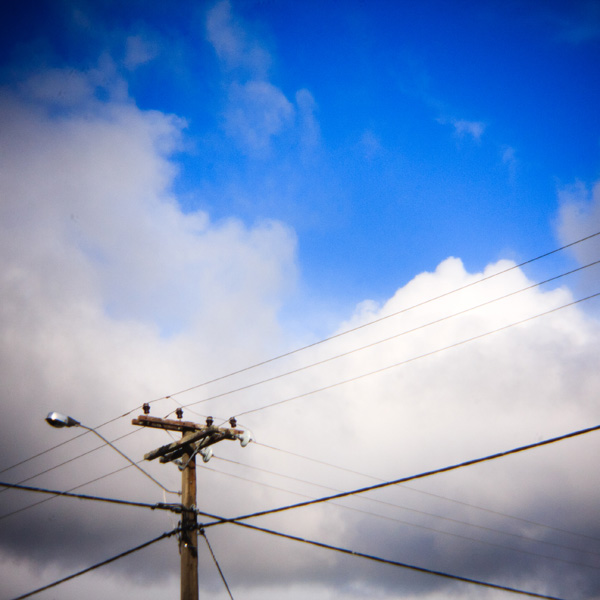
2. Use a toy film camera like a Holga. Again, a good quality scan is essential to make the most out of the negatives. If you don't want to use film you can buy Holga lenses for digital cameras and crop the image to a square. That's how I created this image:
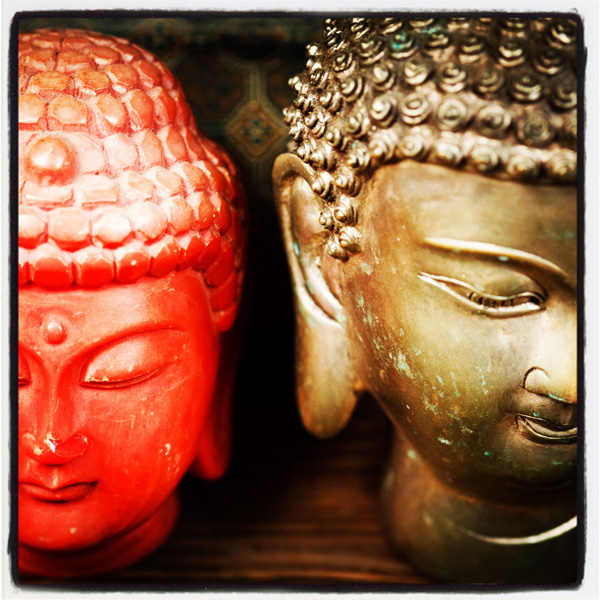
3. Use a smartphone camera and convert the photos to square format using an app like Instagram. Another approach is load photos that you already have taken onto your phone or tablet and run them through Instagram. I used that method to create this photo:
4. Use a digital camera and crop the images to the square format when you process the Raw files. Many recent models let you take square images in Live View. I'm sure this is the method that the majority of readers of this website will use.
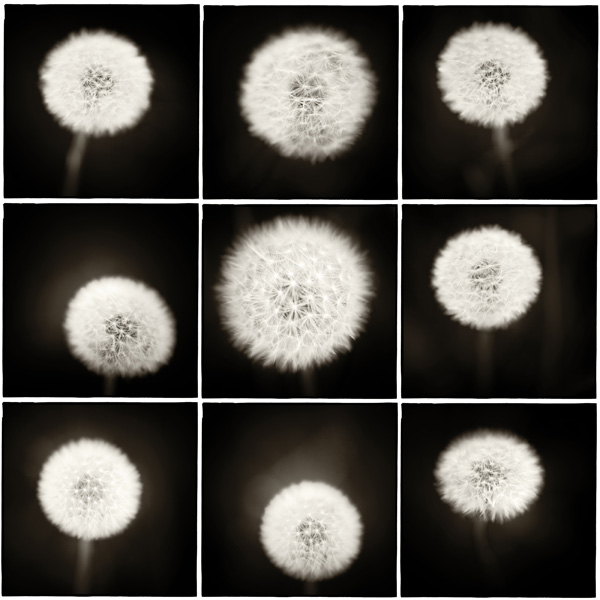
I think of the square format as the fine art photographer's format. It has a venerable history and has been used by some of the great names of 20th century photography. Now, in the digital age, photographers are using the square format in fields as diverse as long exposure photography and iphoneography. Here are some more reasons that I like the square format:
If you've never used the square format before, it's well worth the effort. It's so easy to crop your existing images in Lightroom or Photoshop that anyone can try it. It can give new life to old images - and the process will teach you a lot about composition and the use of space within the frame.
My ebook Square explores the square format from the digital photographer's perspective. It shows you how to use the square format on your camera, and how to make the most out of what I think of as the fine art photographer's format.It's available now at Snap N Deals for a special price for a limited period.
Post originally from: Digital Photography Tips.
Check out our more Photography Tips at Photography Tips for Beginners, Portrait Photography Tips and Wedding Photography Tips.
The Beautiful Square