For those of you who don't know, cyc is short for cyclorama. They are in most professional studios and have replaced the seamless paper almost entirely. Why? Because with a cyc, you have complete control over your background. A cyc is where the corners and seams are not visible. Cycs normally cover two sides of the studio. Assuming that your model is far enough away from the cyc, lighting can be controlled so that the background effect can be light or dark. Colored lights, cukaloris and other patterned screens can be used on the cyc to create interesting background effects. When lit evenly, the smooth surface, even as it goes around the corner of a studio, can provide an "infinity effect" - an endless space behind the models.
You can either light the cyc or not light the cyc. I will show you the difference. To achieve an "infinity effect", I light the background with 4 light heads. 2 on each side. They are angled at a 45 degree angle to hit the background evenly. I use V flaps behind my lights to control flare and spillage onto the set.
This shot is using the 4 lights on the background effect:

As you can see, there is no shadow on the background. It is a smooth, endless appearing background.
If you want to create a black background, obviously just don't light the background at all. With your main key lights that will be lighting the model, make sure you flag the light off the background so there is no spillage behind the subjects. In this shot, I photographed a different model on a different day but on the same exact cyc. There is just no lighting on the cyc, whatsoever.

Again, the model is far enough from the background but this time it is not as important than if I had lighting on the background because I don't have to worry about spillage from either my key on to the background or my background light spilling onto the set, thus interfering with my lighting on the model.
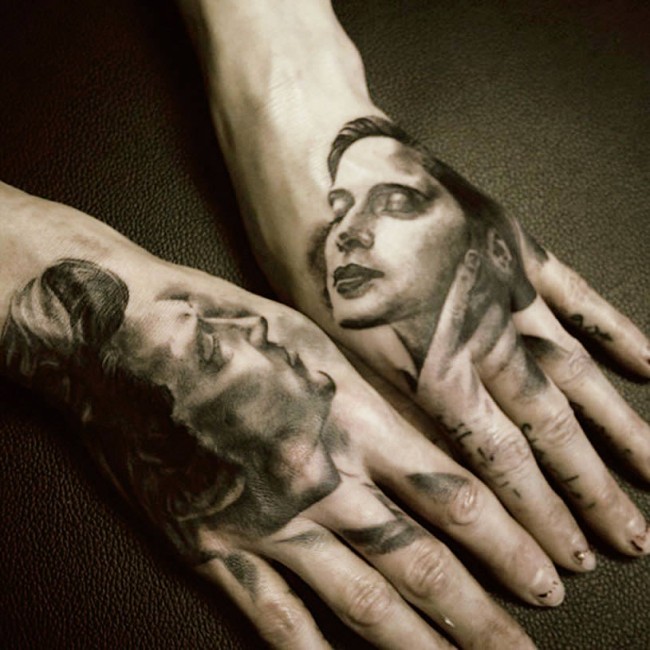
For mood, you can create a gradient on the background, giving the effect that the background is indeed there but not competing with the model or the overall impact of the image. You can try throwing one light on the background to create a splash of light across the back or you can use lights from different angles, I've even placed a light head on the floor and pointed it up toward the background to create an interesting effect. This is a shot where I used one head on the background in order to create a silhouette effect behind my models:

The key point of interest is around the faces of the young men I photographed. In order to bring the viewers eye to that point of interest, I lit the cyc at that particular angle so it backlit the models and created more detail.
With lighting a background or cyc, you need to experiment. Try 4 lights, then 2 lights. Meter your background and try different exposures. I get about a 1 to 1 1/2 stop ratio between my background and my key light when I intend to blow out the background and create the infinite seamless white background. When I go totally black, I just make sure I flag everything off from my key lights so there is no spillage.
One thing I would stress is that there is no "right" way. It's entirely up to the photographer's eye and taste on what he/she is trying to achieve. There are all kinds of formulas, all kinds of mathematics and theories out there. I'm a photographer, not a mathematician. You can go to DPreview for that kind of technical stuff. I just know what looks good and I learned that by trial and error. I will leave you with one last example. The two shots below are from a shoot I did for Universal Records in NYC back in April 2008. I shot the band Heavy Mojo. We were going for a white background effect with the band. I got it. Then I wanted to shoot the lead singer for my own personal work and he agreed. I turned off my background lights, put a beauty dish on my one key light and placed him pretty much directly under it. Here are the two lighting effects, same model, same cyc, different background lighting. And of course, a different key light.


All Images 2008 Melissa Rodwell Photography LLC.