
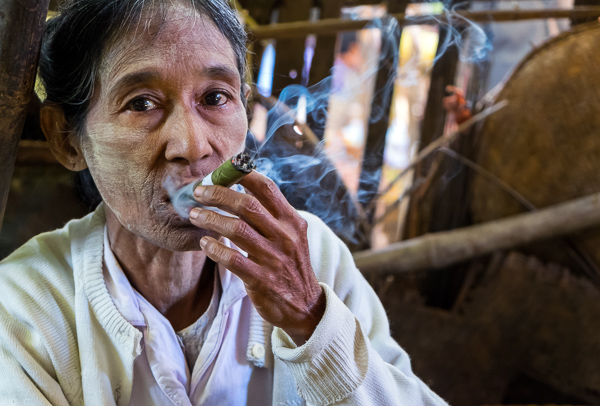
Beautiful portrait photography by Cyril Lagel.


Visit Cyril Lagel

A series of original design products postcards, posters and coasters that represent the glory and spirit of India.


Visit Ranganath Krishnamani
No matter what the season, people love to congregate in special places to celebrate or commemorate special events. Here are some tips that may help you take maximum advantage of the opportunities that festivals and historical reenactments present.
Do some homework before you attend the event, to get an idea of the subject of the celebration, and something of its history. For example, if you are attending a battle reenactment, a little research before you arrive may give you an inside advantage as to how the battle may unfold in front of you. Even local street festivals exist for a celebration, so know what you can expect to experience, such as special displays, parades, entertainers, and fireworks.
For instance, some events may not allow you to bring coolers or large backpacks into a crowded venue, which could include your camera bag. Prepare accordingly to abide by the rules.
You'll know ahead of time when to arrive and which locations you would like to shoot first.
Preparing a shot list is a good way to help you to get all the images that you intend to capture. It is so easy to get caught up in a single attraction, then, when day is done, realize that you missed a lot of other shooting opportunities. So give yourself a game plan for the day, remembering that schedules can be flexible.
The early bird gets the worm or the best parking place. Of course we know the best light of the day is during the early morning and pre-sunset, so arrive early and stay late to take advantage of it. Also, at many events the crowds don't arrive until midday, and many who arrive early may also leave early.
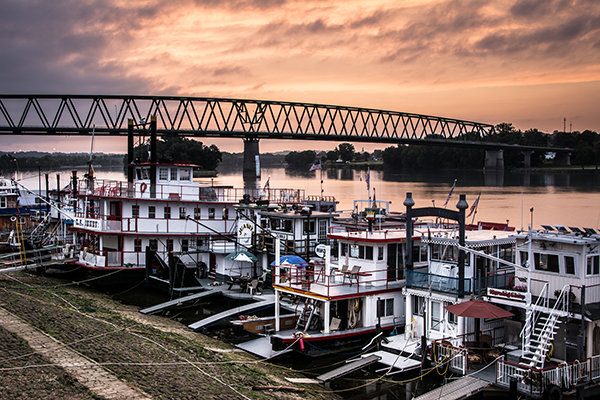
Sunrise at the Ohio River Sternwheel Festival gives a colorful view of the event before the crowds arrive.
Upon arriving it is very important to get your bearings, which may require taking a compass reading. This becomes very important when looking to for the best lighting and vantage point from which to shoot.
Interaction with the event coordinators, staff, participants or re-enactors of an event can be very beneficial to you when it comes to getting inside information, and perhaps some behind-the-scenes shots. In some cases getting to know the right person might land you a unique vantage point, not accessible to the public. Offering to send photos to them can also be great way to get access to some great images. (Don't forget to get contact information.)
Always bring a spare camera battery. There is nothing worse than missing a great shot because your battery went dead. Spare memory cards are a must also, because you could be shooting thousands of photos each day and you want to have enough memory with you to hold all your images. For shooting in the middle of the day, in the harshest lighting conditions with deep shadows, consider using your pop-up flash to provide fill light for close-ups and portraits.
Be prepared by checking the weather forecast ahead of time. You may find yourself standing for long periods of time in the direct sunlight, so sun screen is a must. Also bring plenty of water to stay hydrated. A wide brim hat can also be useful to keep the sun out of your eyes. Your equipment also may need protection from weather elements, especially moisture related.
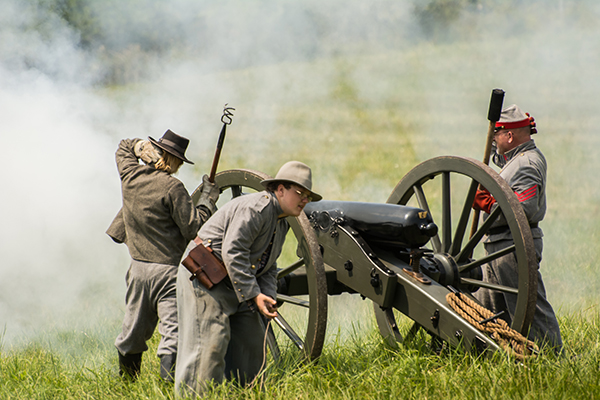
Wind direction can be very important if you are photographing an event where there will be weapons (e.g. canons) fired. If your shooting location is downwind from the action, all you may get in your image is a lot of smoke. In some cases this could add some very interesting effects but, it is best to be aware of this ahead of time.
Sometimes photographing these events can mean shooting in very crowded locations with everyone wanting to get that same great shot. Be courteous to your fellow photographers, interact with the people around you and work to help everyone have a great experience. Offer suggestions that might be helpful to those who are obviously less experienced. Also, remember festival workers are providing a service to you and in many cases it might be for very little or no pay, so be considerate of them.
A good walk-around lens, like a 28-300mm or 18-200mm zoom, is a desirable choice for these types of events and will allow you to use the same lens all day. However, if such an item is not in your arsenal, narrow your options down to just a couple of lenses, like a wide angle and a 200mm or 300mm telephoto. If you choose to use multiple lenses, remember there can be lots of dust in the air at outdoor festivals, so you need to be careful while changing them not to get dust in your camera, which will find its way onto your sensor. If you must change lenses it would be a good idea to try to find a dust-free area, (your car would be a good spot, if parked nearby).
Raising your ISO will allow the shutter speed to stop the action and aperture to maximize your depth of field. However, in some instances a narrow depth of field may be useful to make your subject stand out from the background.
When you are shooting at a reenactment event, the last thing you want in an otherwise perfect image is a car or other object that will seem historically out of place in the background. In some cases you can remove these objects in post-production, but it is best to avoid them, and look for a different vantage point that allows you to exclude them.
Be observant to discover details that may make your shots stand out from all the other photographers shooting at the same location. Look for expressions on the faces of participants and spectators, as well as interactions between them.
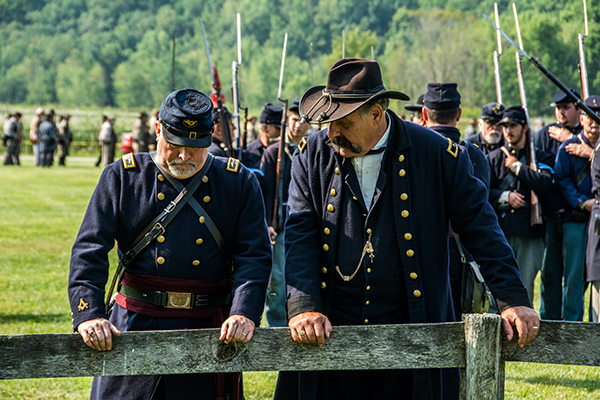
Two officers standing at the fence discussing battle strategy.
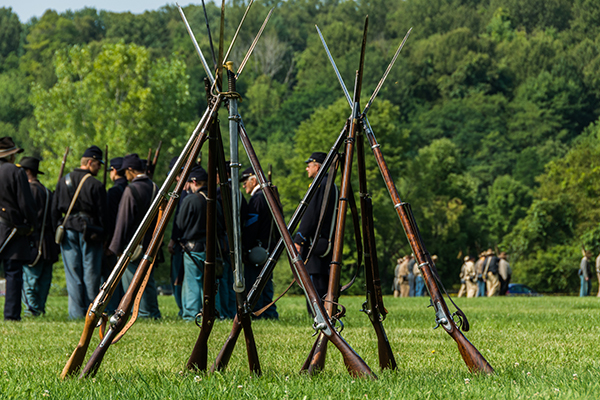
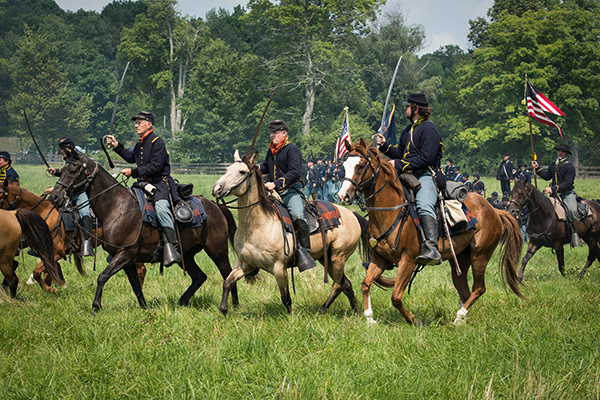
This image captured from ground level, features a unique detailed view of reenactment maneuvers.
Remember to keep in mind where you are, when you are looking through your lens for an extended period of time. It is easy to lose track of just how close to the action you might have become.
You've heard it said that picture is worth a thousand words, so look for images that tell a story. It doesn't make much difference how well the photo is composed, that your exposure is correct and image is in sharp focus, if the shot doesn't communicate the event experience to the viewer.
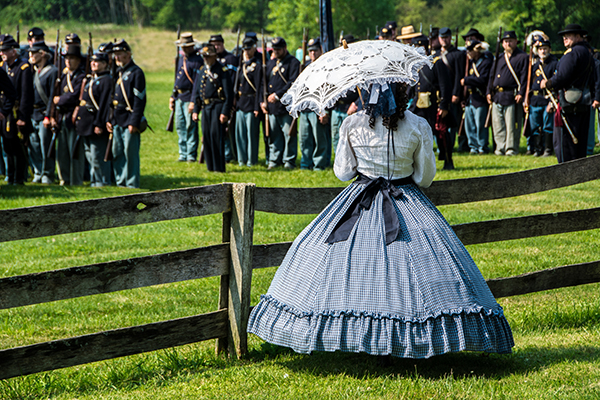
Lady in period dress, watching and waiting, tells a story.
If possible, returning for a second day can allow you to get some really great images. After attending the first day, it becomes easier to anticipate the action (especially in the case of a reenactment event), pick up other happenings missed the first day, or re-shoot favorite subjects with alternate lighting and camera settings.
Often times festivals or events are looking for images to use for next year's promotional material. Depending on the event's budget, some might even offer to pay for desirable images, while others may not be able to offer more than a byline (it's still very cool to see your images published). Many events hold a photo contest that pays prize money and features the winning image in promotional material. You should give such an opportunity your best shot.
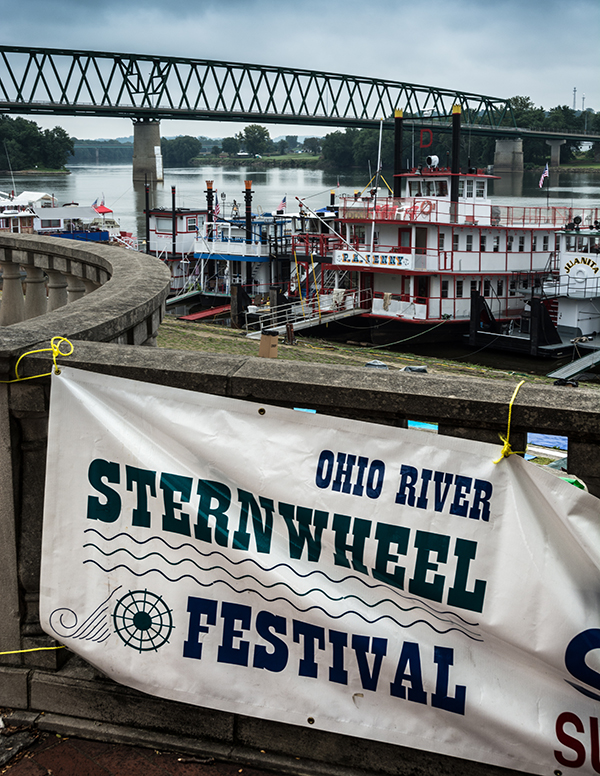
Shoot images that might interest event organizers, such as this image from the Ohio River Sternwheel Festival held in Marietta, Ohio.
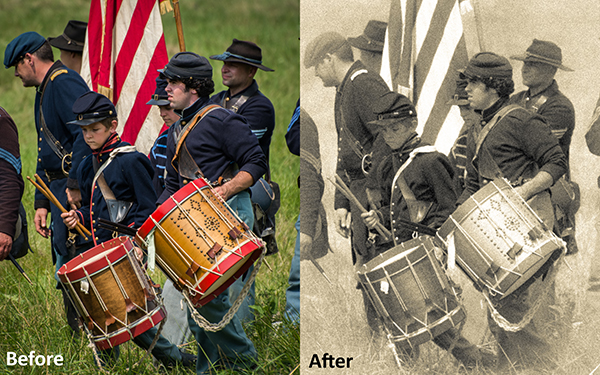
Giving your image a nice sepia tone to match the photos of former eras can be an interesting way to present reenactment or old-time feeling events. Click on this link to download an American Civil War Lightroom preset. This preset will give you the era's sepia tone effect, with faded corners and added grain.
Remember to have fun when you are photographing events and festivals. It is easy to get so involved with getting that perfect shot that you don't take the time to enjoy the experience. Please share some of your favorite reenactment or festival shots.
The post 20 Tips for Photographing Historical Reenactments and Festivals by Bruce Wunderlich appeared first on Digital Photography School.
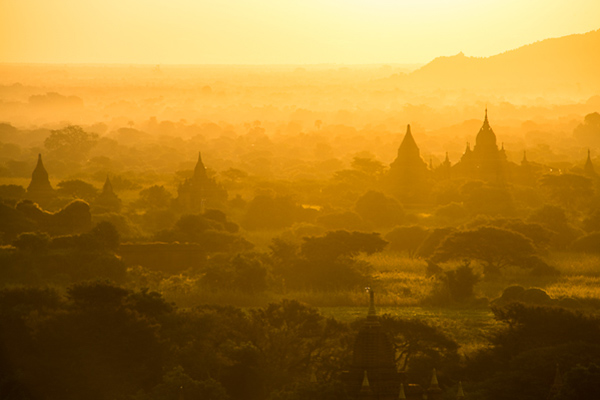
As a travel photographer, either on assignment or shooting a personal project, capturing great quality images that represent the spirit of a place and its people is key.
Looking to achieve that was a priority for me, so I always traveled with a bag full of gear, including at least two DSLR bodies, three or four lenses, flash, tripod, batteries, etc. It was a heavy load, and it slowed me down. I am a Nikon shooter, so my first approach to unload weight was to carry an all-purpose lens. I got the Nikon 28-300mm, and along with this, I'd carry the 14-24mm for wide-angle shots. Now I needed a backup camera or second body. I debated whether to keep carrying another Nikon body or to try something more compact. Finally I decided to get myself a mirrorless camera; enter the Fuji X system. My first mirrorless camera was the Fuji X-E1 with the kit lens, the wonderful Fuji 28-55mm. That camera was a turning point for me, and after my first trip I was sold on the system. Yes, I still shoot Nikon, but I just don't travel with those big guns anymore.
The mirrorless technology is now really advanced - gone are the days when the image quality was not up to par with DSLRs and the availability of lenses was scarce. There are similar options from different manufacturers: Sony, Olympus, and Panasonic all have systems that eliminated the reflex portion and bulkiness of the typical DSLR. Please understand that I am mentioning Fuji because that's the camera I use, but this is not an article to discuss a specific camera or brand. What you should consider is that for the most of us, the image quality of these cameras nowadays is amazing.
I'd say I've switched, at least for travel. Fuji is now my go-to system for everything on the move, including photo walks. If you are planning to invest in a camera system, you should at least give mirrorless consideration, and here is why:
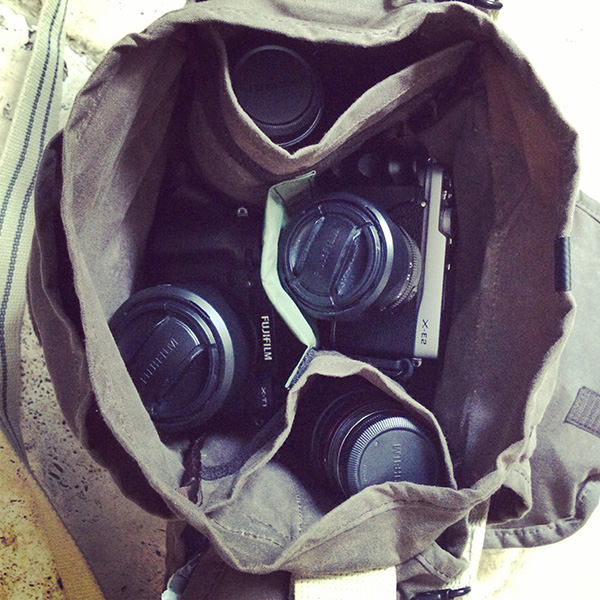
When using a mirrorless system, traveling light doesn't mean that you'll be out of options in the field. In just a small camera bag, you can fit a lot. This Domke F-3X Super Compact bag contains two bodies, five lenses, a flash, four extra batteries, radio triggers, a GPS for geotagging and SD cards. What I have here in terms of camera are the Fuji X-T1, Fuji X-E2, Fuji18-55mm zoom, Fuji 55-200 zoom, the 23mm and 35mm primes and an 8mm fish-eye from Rokinon. Believe me, I can carry this all day long without putting strain on my back, which brings me to the second point.
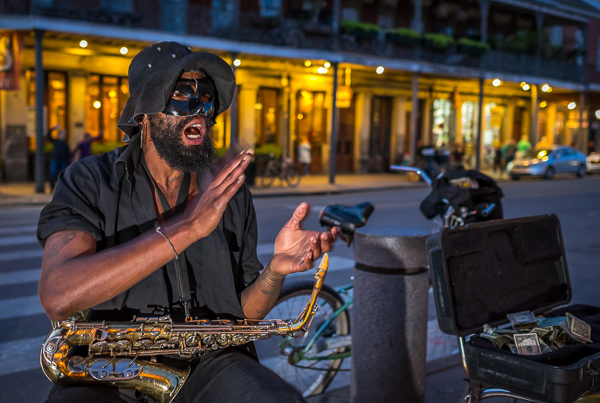
Wandering light means you can wander more. A small and light kit won't wear you out and you can pretty much shoot all day long. With these cameras you can always have one on you, even if you are not carrying a camera bag. There are plenty of options where you can take them on your belt and even inside the pocket of a jacket. Having a camera with you all the time brings more opportunities to capture the people and places where you are traveling. The photo below was taken my first day in New Orleans; after a long flight I just went out for a walk with the Fuji X-E2, the 23mm prime and a flash in my pockets, and when the opportunity presented itself I was able to shoot it.
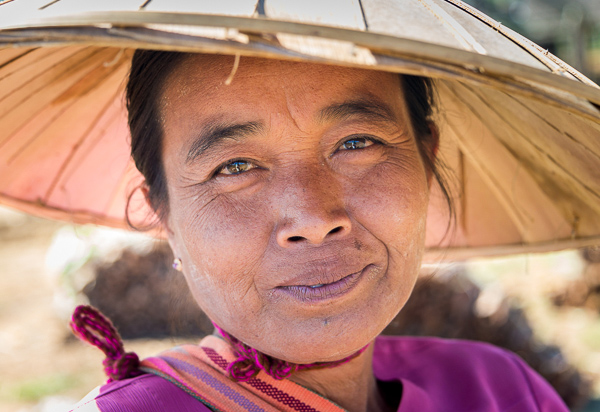
There is nothing more annoying than people being scared of you. Trying to stick a big lens or camera in front of people in public spaces, or even worse, in remote locations where you don't speak the local language, is a formula for disaster. There is also a difference if they see you as a pro photographer or just another tourist. When you carry a small camera, you'll most likely go unnoticed or they won't feel as intimidated as they would when they think you are pro shooting for a magazine. I personally love to shoot markets: these places, away from big cities, are one the best ways to explore local cultures. I've noticed a big difference since I started to shoot with the Fujis on my trips. I can blend in more, I can aim the camera, smile, and get a photo with no problems, whereas before many times I'd have people turning their faces down or away from me. Just consider this fact alone and the difference it can make in your photography.
Another great feature besides what is mentioned above is how easy it is to work with an electronic viewfinder. Imagine being able to see exactly what are you getting in your viewfinder before making the shot. You can quickly adjust camera settings and see the changes on the fly. Seeing where your whites are clipping or how the shooting mode will affect the result of the image without having to move your eyes out of the viewfinder is phenomenal. I could go on an on about the benefits, but I am not a technical person.
If you like to travel and go places, in my opinion this is the way to go. The future is even brighter, as manufacturers continue to develop their lineups. Mirrorless is versatile and delivers excellent results. Touring light will make your travel photography better and you'll be able to enjoy your trip more.
Any other mirrorless fans here? Show us your photos and tell us about it.
The post Carry Less - Photograph More: Elevate Your Travel Photography by Daniel Korzeniewski appeared first on Digital Photography School.

Dose of creative conceptual illustrations by Deruch. Enjoy!


Visit Deruch

Geometry + Geology is an exploration of the formal and expressive affinities between Brutalist architecture and glaciated rock formations. The pa... Read More


Visit Daniel Hewitt