I received an email last week from a photographer in Michigan who was curious how I added the white border and text to my prints (posters actually). There are many ways to do this in Photoshop (and Scott Kelby's books detail most of these methods) but I prefer to let Lightroom 2 handle the heavy lifting most of the time.

The first step in creating this type of Print Template is to setup a custom Page Size in Lightroom 2 such as the 20 x 16 page shown above. I chose 20 x 16 since its a common frame size available and the white borders used result in a very viewable 17 x 11 image size.
Once you've set your page size you'll need to change the Image Settings as shown below to add a medium gray Stroke Border around your image giving it the appearance of being matted.
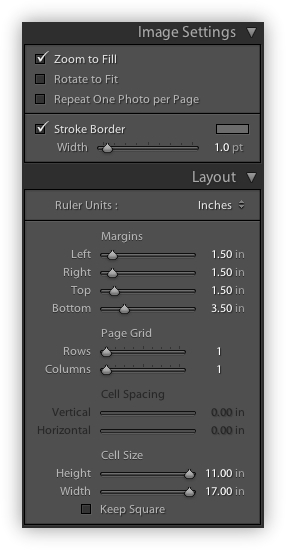
Lightroom Image Settings & Layout
To create a poster Layout, you'll need to change the Margins to add the white border and set the Page Grid to 1 row and 1 column. This should result in a Cell Size exactly 17 wide and 11 high.
I use Lightroom 2 s Overlay settings to add a custom Identity Plate to the white border below the image as shown below.
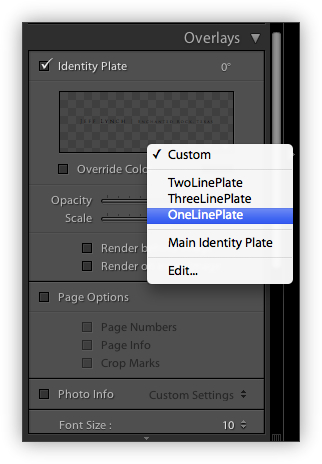
Lightroom's Overlay Settings
This is where things can get a little sticky so I've created three custom Identity Plate templates including a one-line, two-line and three-line version to add and modify as needed.
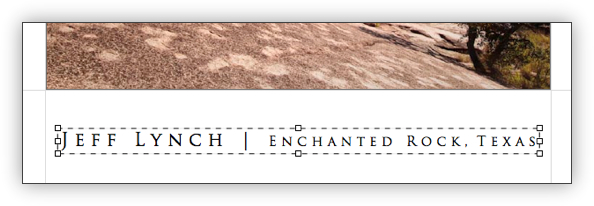
Centering Lightroom's Identity Plate
Centering the Identity Plate in the bottom white border can be a little tricky in Lightroom 2 and this feature has been improved only slightly in the Lightroom 3 beta.
The best way I've found to do this is enlarge it to 100% and then center it with the edges of your image, moving it up and down, little by little until it looks about right. Then reduce to to somewhere between 60% - 75% until the text is smaller than the image width as shown above.

Editing an Identity Plate
A few tricks to make this look really nice:
- Use an all-caps font like Trajan Pro for a really elegant look.
- Add a blank space between each letter in a word and three blank spaces between each word.
- Create a multi-line identity plate by adding pressing Option+Return to start a new line.
- Use different font sizes for different parts of the identity plate.
Once you've finished this you can save this as a Print Template to use again and again.
Posted in Photography Tagged: Adobe Lightroom 2, Lightroom Print Templates

![]()
No comments:
Post a Comment