I realize that this post may offend a certain population of wildlife photographers out there and for that I do apologize. I'm not a wildlife photography "purist" and I will enhance my wildlife images in Lightroom or Photoshop just as I do my commercial, portrait or landscape work. I do this in wildlife images for the very same reason I do it in other types of images, to tell a story and to evoke an emotional response. For me, that's what photography is all about.
Having said that, I do realize that many well known wildlife photographers (and most wildlife magazines) require that the image be manipulated as little as possible, just as a photojournalist would when covering the war in Iraq for example. I certainly respect that style of wildlife photography but it's just not my style and that's why I'll always let you know when I've manipulated a wildlife image during post capture processing as I did in this image below.
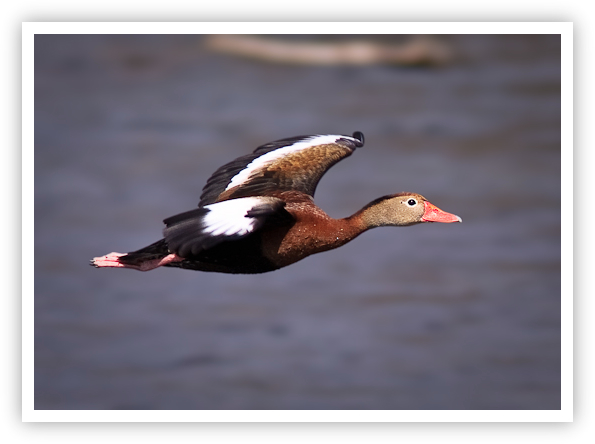
Flying Solo
Copyright 2008 Jeff Lynch Photography
Shot taken with a Canon EOS 50D set on aperture priority (Av) using an EF 300mm f/4 L IS USM + EF 1.4x Extender monopod-mounted. The exposure was taken at 420mm, f/5.6 for 1/500th of a second at ISO 100 on SanDisk digital film. Post capture processing was done in Lightroom 2 and Photoshop CS4 using Alien Skin's "Bokeh" plug-in filter. Click on the image above for a larger version.
My first step in creating this image was to process it as I would normally do in Lightroom. I generally work on the Basic settings like Exposure, Recovery (very important), Blacks (also very important), Brightness and overall Contrast. I almost always crank up the Clarity (adding mid-tone contrast) and Vibrance (adding mid-tone saturation) and may play with these two settings for 20 or 30 minutes until I find a combination I like.
At this point, my work in Lightroom is complete and my next step is to export the image in Photoshop CS4 and use the Quick Selection tool to select the duck as shown here. Although the selection doesn't have to be pixel perfect, it always pays in realism to spend a little extra time making a thorough selection of all parts of the subject.
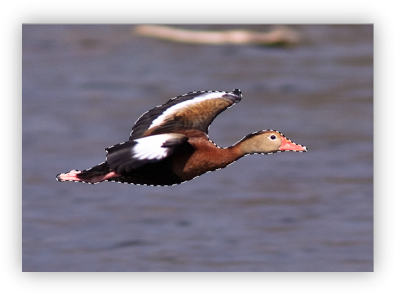
Using the Quick Select Tool
Once you've got a basic selection done it's time to use the Refine Edge tool to Smooth, Feather and Expand the selection you've just made. For birds in flight these are the settings I normally use to make sure all the bird's feathers are included in the selection.
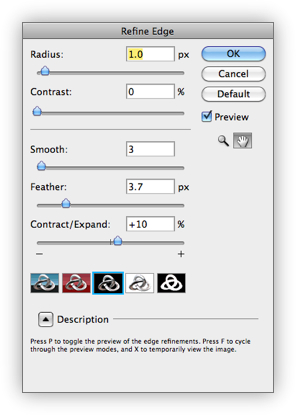
Smooth, Feather & Expand the Selection
Once that's done your new selection should look something like this.
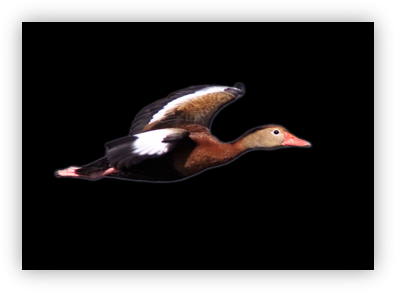
Selection Refined
You'll understand why this step is vital when you begin to play around with the settings in the Alien Skin Bokeh plug-in filter.
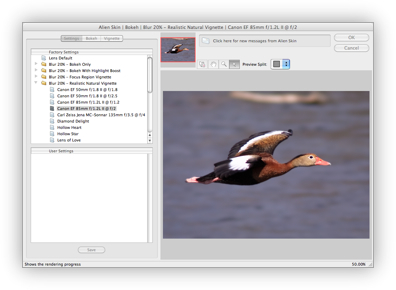
Click on the Image Above for a Larger View
Bokeh provides creative controls to enhance images by focusing the viewer's attention anywhere you want. In the image above, the Bokeh plug-in was used to enhance the background blur. This allows me to shoot the image at f/5.6, which is the fastest my Canon EF 300mm f/4L + 1.4x Extender can go, but make it appear as if I shot it with Canon's much more expensive EF 400mm f/2.8 lens. Blurring the background in an image like this one makes the subject "pop" and seem that much sharper.
Another trick to enhance an image like this is to apply some sharpening to the subject only, as shown below.
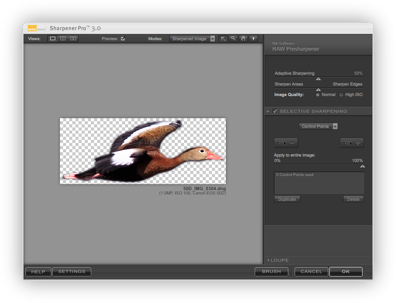
Click on the Image Above for a Larger View
It's easy to do this by clicking on the layer that your selection is on and using Nik Software's Sharpener Pro plug-in. I prefer this plug-in because it acts more subtly and with fewer artifacts showing up in the final image. Sharpening only the selection is important since you'd hate to mess up that beautifully blurred background you just created using Bokeh.
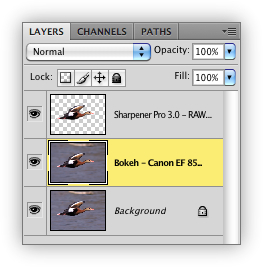
Blending Layers in Photoshop
The final step in Photoshop CS4 is to blend the three layers you've just created using Lightroom (background layer), Alien Skin's Bokeh (bokeh layer) and Nik Software's Sharpener Pro (sharpener pro layer). Now you could do this simply by flattening the layers but I suggest you take a little time and experiment with the Opacity of each layer until you achieve the desired results. I tend to blend the Bokeh layer at 100% but the Sharpener Pro layer at only 60% - 80% to achieve the most realistic look to my image.
Once you've completed this process, you just save the image in Photoshop and it should automatically show up in Lightroom, ready to be exported or printed.
Posted in Photography Tagged: Alien Skin Bokeh, Bird Photography, Canon, Canon 50D, Photography, Wildlife Photography
![]()
No comments:
Post a Comment